Somewhere in the neighborhood of 12-13 years ago, I wrote a guide to The Answer, the 25-30 hour epilogue to the monumental PlayStation 2 Japanese RPG, Persona 3 FES (it ranks highly on my personal most memorable games list). Despite its age, I still have the original guide, which I wrote in plain text format using Windows Notepad (long before my switch to Linux). In light of the renewed interest in Persona 3 with the release of the original game’s third re-master, Persona 3 Reload, I thought it would be fun to look back on the first re-master, Persona 3 FES. Moreover, The Answer epilogue is exclusive to Persona 3 FES, having not been present in the original Persona 3 and having been excluded from the third and fourth versions of Persona 3, Persona 3 Portable and Persona 3 Reload, respectively.
Note: If you are familiar with Persona 3’s story and just interested in jumping to my party selection guide for The Answer, use this link to cut to the relevant section.
- Spoiler Notice
- A Brief Introduction
- Why Did I Make a Persona 3 FES Epilogue Strategy Guide?
- Spoiler Forthcoming
- Introducing The Answer
- How Fighting in Persona 3 FES Works
- Understanding the Gameplay of The Answer
- Introducing the The Answer Characters
- My Answer Party Selection Guide
- Is My Guide Good?
- Foonote
Spoiler Notice
Before continuing, please take heed of an important spoiler note. All four versions of Persona 3 feature what is roughly the same 70-80 adventure (FES added a few events to the story, Portable included the option to play as a girl, and I understand that the Reload remake has added additional points that were not present in the first three versions, albeit omitting the option to play as the female protagonist). This guide is about The Answer, a separate story that takes place a couple of months after the answer of the main Persona 3 story. The Answer is exclusive to Persona 3 FES. Persona 3 FES calls the main Persona 3 story that appears in all four Persona 3 versions The Journey and the FES-exclusive 25-30 hour epilogue The Answer.
In this article, I will not spoil what happens in The Answer beyond how it starts and basic points such as the names of dungeons and the number of boss fights. However, I will spoil a major event that occurs at the end of The Journey – i.e., the main Persona 3 Adventure – or more accurately, I will assume that people reading the article are familiar with it. If you have not yet played through any of the Persona games to the end, have not been spoiled on the ending, and are considering playing Persona 3 Portable or Persona 3 Reload (both are available for PC and multiple consoles) or hunting down an old PlayStation 2 Persona 3 copy, you may want to refrain from reading the sections of this guide that reference The Journey’s ending until you have a chance to go on your own Persona 3 Journey. I will include a reminder about spoilers right before I reach the spoiler section.
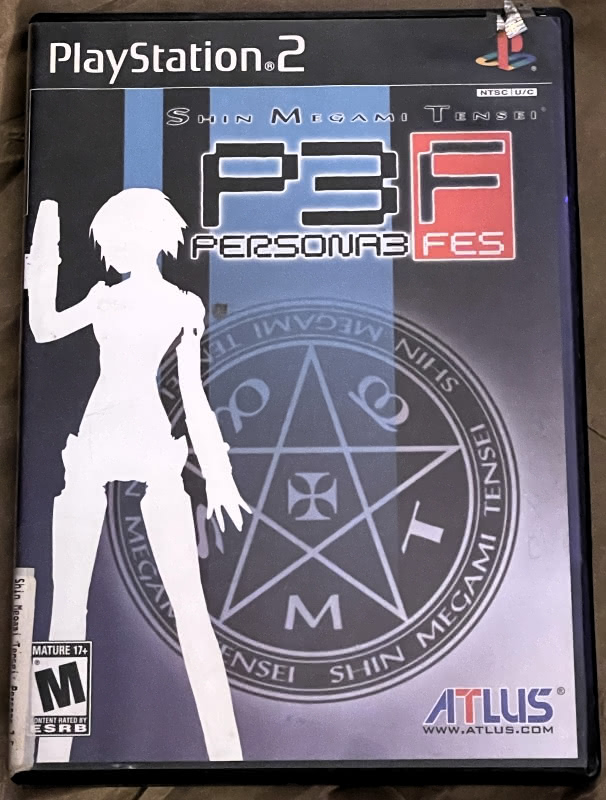
A Brief Introduction
I put Shin Megami Tensei: Persona 3 FES number five on the list of the 12 video games that left the biggest impression on me in the last 30 years. Persona 3 FES is a Japanese RPG, that between its main game and its epilogue, should take most players somewhere in the neighborhood of 90 to 110 hours to complete (or more for the most careful completionists). It shows its age in many respects both in light of the fact that it was first released in Japan in 2007 (FES was an enhanced version of the original Persona 3, which was released in Japan in 2006) and also because its successors in Persona 4 and Persona 5 refined Persona 3’s formula in many areas.
Persona 3 revamped the Persona series, which had seen two previous entries, by having the player take the role of a 11th grade high school student in urban Japan. The player could fight monsters (“shadows” in Persona parlance) at night while living a normal school life and making friends during the day. The combination proved to be a hit both in Japan and abroad, and Persona eventually turned into a full-fledged spinoff series from the main Shin Megamei Tensei series (produced no later than by the remastered version of Persona 4). Persona 4 and Persona 5 made some much needed improvements to the social sim aspects introduced in 3 (I dare say Persona 4 has the best of the social interactions), but Persona 3, despite being antiquated in many other respects, still has its dark tone and compelling overarching story to recommend it.
The Answer was a 25-ish hour-long epilogue released with Persona 3 FES, which was an enhanced version of the original Persona 3. The Answer takes place shortly after the events of the main game and generally features the same characters. FES distinguishes itself from The Journey, or the main Persona 3 adventure, in several areas. Firstly, it drops the social sim elements entirely and focuses exclusively on combat and telling a linear story through many cut scenes. Secondly, it is harder than the base game. Its difficulty cannot be toggled (it is essentially equivalent to Hard in the base game), and it imposes more limitations on how players can navigate the dungeon and strengthen their assortment of personas to use in combat than does regular Persona 3.
I have read mixed opinions of The Answer, but count me as one of its biggest fans. It provides what stands today as the purest, best combat and dungeon crawling challenge and experience in the modern Persona games. While it drops links (for whatever it is worth, most of the links in Persona 3 were lacking when compared to 4 and to a lesser extent 5), the story serves as an interesting study on grief and moving forward and a perfect capstone to the grand adventure that is Persona 3.
I may, at some point, go into more detail on why I like The Answer and think that it is important enough to allow FES to hold the title of most complete of Persona 3 so long as none of the other Persona 3 versions include it, but that will be a topic for another day.
Why Did I Make a Persona 3 FES Epilogue Strategy Guide?
I played through Persona 3 FES in 2010-11. Not too long after (I forget exactly when), I lent it along with my PlayStation 2 to a friend. My friend cleared the main game and was ready to take on The Answer. I vaguely recall that my friend wanted to finish by a certain date – but I forget the precise details. In any event, I wrote a spoiler-free strategy guide for my friend to use at his discretion, but I did not send the guide until after my friend had completed The Journey since discussing strategy in The Answer in a meaningful way invites recognizing what happens at the end of base Persona 3.
Spoiler Forthcoming
Below this point, I will write as if readers are aware of what happens at the end of the Persona 3 base game before the epilogue. If you, for whatever reason, want to avoid that knowledge for the time being (e.g., if you have Persona 3 Portable in your game backlog or are planning to play Persona 3 Reload without having played the previous Persona 3 versions), feel free to bookmark the article here and return to it later.
Introducing The Answer
I paraphrase the beginning of my guide:
As you can probably infer from the ending, Japanese [insert friend’s name] will not be making an encore appearance.
The protagonist of Persona 3 goes on a very long journey after The Journey. This prompts the first change that we see in The Answer epilogue.
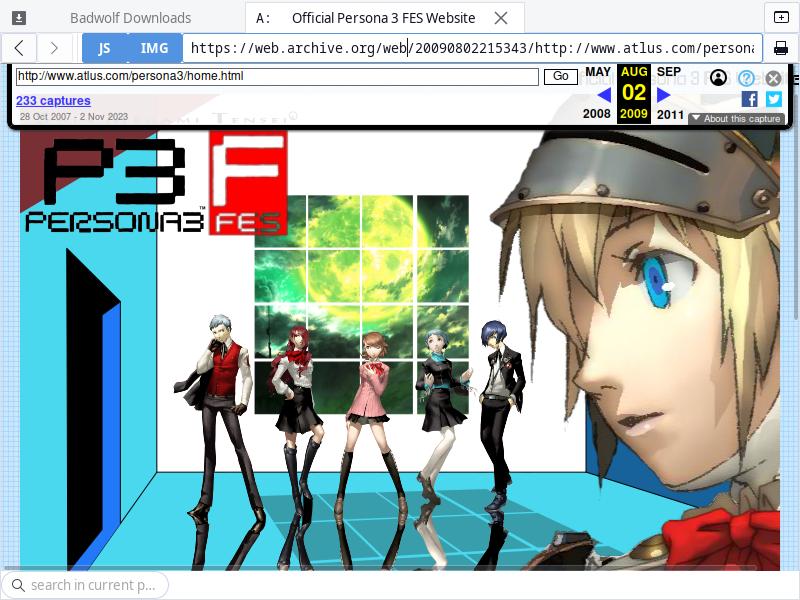
Persona 3 follows the Specialized Extracurricular Execution Squad (“SEES”) as they fight to eliminate dangerous shadows and eventually save the world. The protagonist, a second-year high school student, ends up serving as field leader for SEES during their expeditions, despite being the newest of four members upon joining, because he has a unique ability to switch between multiple “Personas” in combat (every other member is locked to one). However, while the protagonist is field leader (succeeding Akihiko Sanada, who is one year his senior), Mitsuru Kirijo, one year his senior, is the leader of SEES.
In the main game, heretofore known as The Journey, the final party consists of:
- Protagonist (a mostly silent, emo-looking boy, controlled by the player – can wield multiple Personas and serves as field leader)
- Yukari Takeba (a girl in the same class as the protagonist and member of the school’s archery club)
- Junpei Iori (a boy in the same class as the protagonist who begins the story as a jealous buddy character but undergoes great development due to a certain tragedy)
- Mitsuru Kirijo (the leader of SEES and the protagonist’s senior by one year)
- Akihiko Sanada (Mitsuru’s classmate and an original SEES member; part of the school’s boxing club)
- Aigis (a humanoid robot girl built to destroy shadows who joins close to the middle of the game)
- Koromaru (a dog)
- Ken Amada (a middle school boy with a grudge)
(Fuuka Yamagishi, a student in the same year but different class than protagonist and Yukari, is part of the team, but she serves as the navigator and cannot be used in combat. Thus, I will not discuss her in this article.)
Because the protagonist of The Journey had departed to go on a very long vacation, someone must step into the void of being the new protagonist and field leader in The Answer. Both Mitsuru, the leader of SEES, and Akihiko, who had been field leader prior to that protagonist, seem like good candidates. If not them, why not Yukari or Junpei, who were the only party members to fight with the protagonist in the early stages of Persona 3 (Mitsuru had to serve as navigator and Akihiko was injured). Yukari was the member the protagonist had met first (in memorable fashion) and Junpei always wanted to be the hero.

While those would seem like obvious choices to be the new protagonist – and as The Answer makes clear, one of them certainly believes he or she should be the protagonist. But none of the four characters I named becomes the new leader, nor does the dog or the middle school boy. Aigis, the humanoid robot who is introduced a few chapters (20-30 hours depending on your playing speed) into Persona 3 and who spends much of the story being highly robotic (she gradually becomes more human as time goes on), is the unexpected player character, protagonist, and ultimately the heroine of Persona 3’s epilogue.
(Turning Aigis into the player character and protagonist in The Answer was a bold, interesting, and in my opinion, correct choice. The reaction of some of the party members to Aigis’ awakening and connection to the hero of The Journey – I am looking at one in particular – plays a central role in The Answer. However, this is beyond our game-play focused scope.)
While Aigis does not have a typical profile for a Persona 3 protagonist (or a video game protagonist generally), she is no novelty – she has the necessary characteristic of a true Persona protagonist. As I noted, the protagonist in Persona 3, 4, and 5 is unique in his (or her, in the case of the option to make the protagonist a girl in the third version of Persona 3, Persona 3 Portable) ability to switch between different personas for combat. All of the other party members are locked to a single persona that evolves at a certain stage of the story. In The Journey, Aigis, like the rest of the party members, can only use a single persona. However, in The Answer, Aigis inherits the Wildcard ability from the protagonist of The Journey, giving her the ability to collect and switch between multiple personas in the exact same way that the protagonist in The Journey (and the protagonists of Persona 4 and Persona 5) are capable of doing.
For our game-play focused purposes, it is sufficient to note that Aigis in The Answer plays identically to the protagonist of The Journey except for the fact that she is locked to a single weapon – her arm gun/cannon (this is a pierce-type attack) – whereas the protagonist in The Journey could use slash and strike weapons as well as pierce to complement persona skills.
(Aigis’ arm cannon is cooler, however – so advantage Aigis.)
In theory, our party would be more limited since Aigis replaces the protagonist but there is no one to replace Aigis as a member of the protagonist’s party. Fortunately – The Answer – which is harder than The Journey for reasons I will go into – replaces Aigis from the player’s party with a new humanoid girl robot, Metis, who claims to be Aigis’s sister. Metis, who is quite epic, will play a leading role in my guide.
How Fighting in Persona 3 FES Works
Before continuing, I ought to introduce Persona 3 FES’s combat system. Note that if you are coming to my guide having only played later Persona games, including Persona 3 Portable, there are a few significant differences between combat in Persona 3 FES and the later games.
The player can have a party of up to four characters at one time, always including the player character (Aigis in our case). Note that my guide is for full parties – so at no point do I recommend using a smaller-than-allowed party.
Persona 3 FES has several types of attacks:
- Physical Attacks: Pierce; Slash; Strike
- Elemental Magic: Electricity (Zio); Fire (Agi); Ice (Bufu); Wind (Garu)
- Insta-kills: Dark (Mudo); Light (Hama)
- Almighty
The only difference between 3 and the later Personas is that Persona 4 and 5 do not distinguish between physical attacking types. Note going forward that insta-kill spells unsurprisingly do not work in boss fights (all bosses are immune) and that none of the party members can use almighty attacks, which ignore all resistances (Aigis can use almighty attacks if she equips a persona with almighty spells).
Every member of the player’s party save for Metis, who has no weaknesses or resistances, and Aigis, whose weaknesses and resistances are determined by her active persona, have at least one resistance or nullification and one weakness. Most of the regular shadow enemies and bosses have at least some weaknesses and resistances. All units have stats in the following categories: HP (health), SP (spirit points for using spells), Strength (physical attacking), Endurance (physical resistance), Magic (magic attacking and resistance as well as healing spell strength), Agility (turn order and dodging), and Luck (many things). All of the player character’s stats other than HP and SP are determined by the active Persona.
If a unit hits another unit for a weakness with a single-target attack, three things happen:
- The attack does extra damage
- The attacking unit gets an extra turn
- The attacked unit is knocked down
These are all true in modern Persona games as well – however, in modern games hitting at least one non-fallen enemy for a weakness with a multi-target attack grants an extra turn, whereas extra turns in FES are only awarded for single-target super effective attacks. There is an even more significant difference in FES regarding knockdowns. In FES, if a unit is down when its turn arrives, it “wastes” the turn getting up, meaning it cannot attack or take any other action. In Persona 4 and 5, the unit gets up and then uses its turn normally. This makes the status of being knocked down in Persona 3 FES much more punitive than in 4 and 5 and invites the player to use knockdowns to prevent the opponent from attacking. In the later Personas, attacking a downed enemy causes the dizzy status, which has a similar effect but nevertheless implicates different strategies. Knockdowns are far more punitive in Persona 3 FES and its predecessor (however, it is easier to score extra turns in 4 and 5 with group attacks).
The final key difference distinguishes Persona 3 FES from Persona 3 Portable as well as from 4 and 5: The player does not directly control anyone other than the player character, which is Aigis in The Answer. The player’s party members can be left to their own devices or the player can select from a limited set of “strategies” for individual party members to follow. For example, the player could tell one party member to focus on knocking down enemies or only attacking while directing another to use healing spells or buffs/de-buffs. This necessarily makes FES a bit more challenging since a good player can make better decisions than the AI, even with effective use of directions, but anyone who beat The Journey on at least normal difficulty should be well-acquainted with how the AI party members tend to behave and how to best manage them.
Understanding the Gameplay of The Answer
The Answer is broken up into seven separate “dungeons” – for lack of a better term: Malebolge, Cocytus, Caina, Antenora, Ptolomea, Judecca, and Empyrean. Every tenth floor of the dungeon sits a boss shadow (or shadows) that the player’s party must defeat in what will usually be a long battle. Malebolge and Cocytus each feature only one boss, but Caina, Antenora, Ptolemea, and Judecca have two separate boss fights on different floors and Empyrean has three. There are four additional boss fights after the dungeons but those are not a primary focus of my guide (if you do not mind spoilers, I discuss three of them in a humorous article from my first Answer run).
The Answer’s structure is more challenging than The Journey for a simple reason. In the Journey, it was always possible to heal right before a boss fight. However, in The Answer, the player cannot “return to base” before a boss fight without having to re-do his or her march through all of the floors of the dungeon before encountering the boss. This makes healing more difficult and punishes the player for having a sub-optimal party for a specific boss. I will explain how this works in practice:
- Let us say that a boss sits on the 10th floor of a dungeon
- The player must get to the 10th floor, which means navigating through the dungeon and defeating enemies along the way
- Once the player reaches the 10th floor, he or she may save before the boss fight
- However, if the player opts to return to base and heal/change party members, he or she must then go through the 10 floors to the boss again – there is no way to warp back to the 10th floor
(Note for dungeons with more than one boss: After beating a boss, the player can warp to the middle of the dungeon. For example, let us say in my made up dungeon with a floor 10 the boss has a second boss on floor 20. In that case, the player can start from floor 10 after beating the floor 10 boss but the same no-warp rule applies at floor 20 before beating the floor 20 boss.)
I wrote (light paraphrase) in my original guide:
You can no longer heal right before boss battles. You can save and even return to the dorm after reaching the boss floor, but you will have to make the trip again.
One reason this is extra tricky in The Answer is because of SP. All characters have HP, which is their health/hit points, and SP, which they consume for magic spells. Physical attacks use HP (one has to be careful since a character faints at 0 HP, or in Aigis’s case only causes a game over). Spells, including elemental magic, insta-kills, and support skills such as healing moves, status moves, and buffs and de-buffs, draw from SP. There is a general paucity of SP-healing items early in The Answer and, while the situation improves somewhat over the course of the game, SP maintenance is an issue throughout The Answer in a way it is not in The Journey. I had SP maintenance in mind in recommending parties for The Answer.
In my original guide, I explained that SP management was one of my main considerations (light paraphrase):
I made this guide so that you can bring the right party for each boss run while minimizing, or eliminating entirely, double trips. However, minimizing double trips will require efficient play on your part. You must be diligent about managing Aigis’s SP and the SP of your party members. You will not obtain any SP restoring items or accessories for a while – although you can buy sodas which restore a meager 5 SP at the dorm one-by-one.
SP management is the key to playing through The Answer efficiently.
An Additional Challenge From Lack of Social Links
Making friends in Persona 3, 4, and 5 has a game-play benefit. Every “social link” corresponds to a Tarot card arcana (see my discussion of a Persona 4 social link). Each of the personas that the protagonist can use corresponds to one of these arcana. In Persona 3, the player cannot “fuse” a new persona that is higher than his (or in Aigis’s case, her) level. However, upon being fused, the persona gains experience and levels based on its corresponding social link rank. This allows personas to gain about six levels off the bat in the best case. Because The Answer has no social links, these bonuses are unavailable – which adds another small element of challenge that distinguishes The Answer from The Journey.
Introducing the The Answer Characters
Before I list my character recommendations, I will briefly introduce each character from a game-play perspective, going in the order they join the player’s party in the Answer . As I will explain a bit further down, I tend to focus on avoiding being hit for weaknesses in Persona 3, so that will be a point of emphasis.eee
Before continuing, note that it is possible in the late game to acquire items to nullify any of the individual elemental or insta-kill weaknesses. Acquiring one of these items can affect some late-game choices, especially for the final boss fight.
- Yukari Takeba
See stats and moves.
Yukari is the best healer in Persona 3, featuring powerful single-target and group healing spells along with a revival spell at a high levels. She is also a decent attacker with a high magic stat and specialty in wind magic. She carries a bow, giving her access to pierce on the physical side. Yukari nullifies wind damage but is weak to electricity.
- Junpei Iori
See stats and moves.
Junpei is a bulky unit focused on physical attacks. His best attacks are slash but he picks up strike and pierce moves at higher levels. He has fire attacks for hitting enemies weak to fire. Junpei gets one buff move to boost the party’s defense. Junpei has a unique skill which heals 8% of his HP every turn due to an event in The Journey. Junpei nullifies fire damage but is weak to wind.
- Akihiko Sanada
See stats and moves.
Akihiko is a jack-of-all-trades character, solid, but unspectacular, on both his physical and magic wings. Akihiko has electricity for his magic attack and can deal strike damage. Akihiko’s stand out features come in the form of his access to strong single-target healing spells (like Mitsuru) and a full assortment of de-buffs to lower the stats of enemies. Akihiko nullifies electric damage but is weak to ice.
- Mitsuru Kirijo
See stats and moves.
Mitsuru specializes in ice attacks and has the highest magic stat of the player’s party, giving her the most damage potential against neutral targets. Mitsuru can drain SP from enemies, which is certainly welcome in The Answer. She carries a sword for slash attacks and has strong single-target healing spells and a number of status moves (never leave her to her own devices unless you want to see her spam status moves over and over again). Mitsuru nullifies ice damage but is weak to fire.
- Koromaru
See stats and moves.
Koromaru uses fire spells and slash attacks, making him similar to Junpei in both respects (albeit Junpei gains other types of physical attacks). Koromaru, unlike Junpei, has access to darkness insta-kill attacks. Another aspect in which he is similar to Junpei is that he gains one party-buff spell, albeit for hit/evasion rate instead of defense. Koromaru is the fastest character of the party. He nullifies darkness but is weak to light insta-kills.
- Ken Amada
See stats and moves.
Ken, like Akihiko, uses electric attacks. Unlike Akihiko, he also has access to light insta-kill spells and pierce attacks instead of strike. Ken brings some versatility with his access to single- and multi-target healing spells (albeit off a lower magic stat than Yukari) and a maximum revival spell at a high level. Ken nullifies light insta-kills but is weak to darkness.
- Metis
See stats and moves.
Finally we reach The Answer-exclusive character, Metis. After Aigis assumes the same role in The Answer that the player character held in The Journey, Metis fills the void in the player’s (now Aigis’) party created by Aigis’ status upgrade.
See Aigis’s stats from The Journey (not applicable to Answer).

However, notwithstanding that Metis, like Aigis, is a robot and that Metis calls Aigis her sister, she plays very differently than party-member Aigis played in The Journey. In The Journey, Aigis was a relatively durable unit who relied exclusively on physical attacks for damage (she was the only party member with no elemental magic attacks),a full array of buffs to boost the team’s stats, and a some mid-level healing spells that allowed her to step in as a healer in a pinch.
Metis is similarly durable to Aigis, but is much more oriented toward offense. She carries a strike weapon (Aigis’ arm cannon is a pierce weapon) and gets access to full slate attack coverage on her physical side (strike, slash, and pierce). Where she really stands apart from Aigis is on the magic side. She gets not one but two single-target magic attacking spells covering ice and wind, and is in fact the only party member in The Journey or The Answer with more than one elemental magic attacking type. While Metis has much more power on the physical side (especially with Power Charge to boost her physical damage), having ice and wind coverage gives her many opportunities to knock down enemies.
One characteristic Metis does share with pre-heroine Aigis from The Journeyis “Orgia Mode.” If the player activates Orgia Mode, Metis will do more damage for a period of 3 turns, but she will act completely on her own without any guidance from the player. If the battle is still going on when Metis’ Orgia Mode expires, she overheats and becomes inactive for a couple of turns. However, while in Orgia Mode, Metis does not expend any HP for physical attacks or SP for magic attacks.
Metis has no weaknesses or resistances, meaning she can only be knocked down by critical hit physical attacks.
My Answer Party Selection Guide
Below, I list my recommended parties for each boss. Fortunately, I explained my thinking behind the guide back when I first wrote it in (probably) 2011. I will paraphrase my explanation here.
In my original guide, I only listed two party members for each dungeon run. Why only two? See my paraphrased original explanation:
The reason why there are only two party members for each trip is because I am recommending Metis every time. She makes getting through dungeons (and moreover, getting through them with everyone’s SP intact) much more efficient. There are two boss fights where she struggles a bit, but I still recommend her because of how helpful she is in getting through the dungeon and because she is durable even when the enemy characteristics limit her ability to do damage.
I specifically referenced that Metis does not burn HP and SP while she is in Orgia Mode. Thus, Metis in Orgia Mode preserves her own resources and, through doing heavy damage, ends battles more quickly than they would otherwise end, thus making it easier for Aigis and the other two party members to not have to burn through their HP and SP. As a general matter, Metis is less useful in boss fights than in normal fights because Orgia Mode should usually (but not always) be avoided in long boss battles due to Metis’ burning out after 3 turns. In most cases, Metis is still an optimal choice because even without Orgia Mode, she is very durable in addition to lacking weaknesses and she hits hard off her physical wing (not to mention battles where the boss has an exploitable ice or wind weakness). It is the case, as I noted in my guide, that there are two boss fights where Metis is unable to do much due to the enemy’s characteristics – but she can still chip away with damage and take damage well.
(Extra Note: Metis has a few mandatory battles in the late game, so even if you decline to bring her on every boss run like I did, she should be kept at a reasonably high level.)
However, I did add a note of caution on Metis usage:
Pay attention to Metis’ behavior when she is in Orgia Mode.
This a key point. I noted that the Persona 3 FES imposed disability of not being able to directly control party members should not be an issue for Answer players since, presumably, they spent 70-80 hours observing how the AI party members behave in The Journey. However, Metis is new, and while the player likely used the party-member version of Aigis’ Orgia Mode a bit in The Journey, Aigis is not the same as Metis. Her Orgia Mode was weaker (it also burned out more quickly) and Aigis only had access to physical attacks. Part of using Metis effectively is knowing when to activate Orgia and when you can guide her into doing something more productive (e.g., knocking down a specific opponent with one of her five attacking types). For example, I recall that Metis in Orgia mode has a tendency, where possible, to knock down an enemy with an Ice or Wind weakness but then immediately hit that enemy again, even if there is another enemy that could be knocked down to set up an all out attack.
For this version of the guide, I will explicitly list Metis since I think that is better for people from the internet who stumble upon it.
Next, I articulated the general principle behind my character choices:
I recommend the most conservative party for each boss so that you will not have to deal (often) with having weaknesses targeted.
Despite SP conservation being a priority, I noted that my teams – especially with Metis’ always being present – are designed to actually defeat enemy shadows and gain experience en route to the bosses – which is necessary in order to be at a sufficient level to win the boss battles:
Be thorough and fight your way through the dungeons to keep gaining levels. If you are sufficiently leveled and have good personas, you should not need to return to the lobby after reaching a boss floor to heal and re-do the floors to level up.
I noted that in my first Answer run, for which I did not have a guide (I knew nothing going in), I ended up stuck with some terrible parties in a few cases. For example, I cited to having brought Akihiko to Cocytus – which is not advisable. I managed to grind my way through bosses with bad parties – but the game is much easier if you do not have Akihiko being constantly hit for his ice weakness by an ice-cold boss.
This segues into another point I highlighted in my guide – and I will note it here despite it being slightly beyond our scope. While I proved in my first unaided run that good play can compensate for the wrong party, the right party does not compensate for bad play. I provided an example of focusing on good play:
This point cannot be overstated: You must get first strikes [against regular enemies]. This is not optional. You do not want to start battles on equal terms. If you end up with enemy advantage and have the wrong persona equipped, you can be killed before you have a chance to move. Learn the range for Aigis’ gun early on. Take your time and beware of The Reaper.1 The cardinal rules of The Answer are first strikes, ending battles quickly, SP conservation, and learning to love Metis’ Orgia Mode.
Outside of boss battles, players see shadow enemies while running around. There are three ways a battle can begin: The player strikes an unsuspecting enemy (player advantage), the enemy strikes the player first (enemy advantage), or neutral. I emphasize that starting battles with player advantage is huge in The Answer and more important than in The Journey. With player advantage, the player can end battles quickly, often before the enemy attacks, and with the minimum necessary SP usage. Starting at neutral limits the player’s move options for ending the battle quickly. As I noted, enemy advantage can end in an untimely demise more easily in The Answer (especially early on) than in The Journey. You get player advantage by hitting the enemy with Aigis’ arm cannon while it is not facing you. Failure to do this consistently will, at a minimum, cause the player to reach a couple of the bosses without sufficient SP to carry the fight.
I did noted that there was one point with my guide that I had not tested:
You may find that some characters fall behind using my guide (for example Akihiko for Caina I). In my first run, I leveled everyone up evenly – which resulted in bad parties for some bosses. Make sure you keep an eye on levels while using my guide.
In hindsight, I disagree somewhat with my concern about leveling – but I will leave that explanation for after the recommended parties table.
| Dungeon | Member 1 | Member 2 | Member 3 |
|---|---|---|---|
| Malebolge | Metis | Yukari | Ken |
| Cocytus | Metis | Yukari | Junpei |
| Caina (I) | Metis | Mitsuru | Akihiko |
| Caina (II) | Metis | Yukari | Junpei |
| Antenora (I) | Metis | Junpei | Ken |
| Antenora (II) | Metis | Ken | Koromaru |
| Ptolomea (I) | Metis | Yukari | Koromaru |
| Ptolomea (II) | Metis | Yukari | Akihiko |
| Judecca (I) | Metis | Akihiko | Mitsuru* OR Ken |
| Judecca (II) | Metis | Ken | Akihiko* OR Koromaru |
| Empyrean (I) | Metis | Yukari | Junpei* OR Koromaru |
| Empyrean (II) | Metis | Yukari | Koromaru |
| Empyrean (III) | Metis | ANY | ANY |
First, note the asterisks for the third member on Judecca (I) and (II) and Empyrean (I). My position on those cases was as follows. If you have the weakness erasing item for Mitsuru, Akihiko, or Junpei, those characters are preferred for the third party position. However, if you do not have the relevant character’s weakness erasing item, I recommend Ken or Koromaru, as indicated on the chart, instead. This was consistent with my focus on avoiding bringing characters with exploitable weaknesses to boss fights.
Regarding Empyrean (III) – there is one simple rule: Do not use your second and third spots on two party members where one is weak to the other’s elemental attack type. For example, Yukari and Mitsuru are fine because Yukari uses wind and Mitsuru uses ice, and neither is weak to wind or ice. However, Yukari and Akihiko would be a no-no, baring weakness negating items, since Akihiko uses electric and Yukari is weak to electric.
Having played through The Answer on one occasion after writing the guide, I recant my concern with leveling up for two reasons. Firstly, I noted one reason in my original guide:
Each time you beat a boss, consult my guide to see if there is another boss in the dungeon. Save for Empyrean, none of the dungeons end with the last dungeon boss. There are always a few floors after the boss at the end of the dungeon. For those, bring whatever party you want – preferably with characters who are falling behind in levels – and Metis, because Metis is awesome.
There are a few floors at the end of each dungeon with no boss ahead. Thus, these provide great opportunities to get characters who may be falling behind or who will be used shortly some extra experience. Contrary to my advice, these are great opportunities to bench Metis since she will not, assuming you follow my advice and bring her on every boss run, be falling behind on experience.
The second reason I disagree with my warning is because Persona 3 FES, like later Persona entries, has a sort of rubber band system which grants extra experience to lagging characters. Thus, while some level differences will appear following my guide, Persona 3 will assist characters in catching up. Additionally, SP becomes less constrained later in The Answer, meaning one can take a few extra battles before bosses that may have been ill-advised in the first few dungeon runs.
The Final Boss
After Empyrean (III), there are three additional boss fights with no party selection option (see my separate article if you have no spoiler concerns). The final boss comes after those three boss fights. There is no dungeon leading up to the post-Empyrean bosses, so the player will go into these fights at full health.
The final boss can unsurprisingly use almost all attack types – the one exception is light insta-kill. In line with my cautious approach, I focused on avoiding weaknesses:
If you managed to not get any element resist heart items (I only had dark/light resist), your default party will be Metis/Koromaru and probably Ken.
Metis has no weakness and because the final boss does not have a light insta-kill attack, Koromaru is weakness-free against it. Ken’s weakness is darkness insta-kill. In my first run, I had an item to counter that weakness, but I noted that the final boss did not use any darkness attacks in any event.
I will note that with a full slate of weakness negating items, Ken and Koromaru would not be my first choices for extra party members. I would probably go with Yukari and Akihiko in a vacuum – but my strong aversion to being hit for weaknesses tends to limit my choices. In my guide, I recommended ideally getting the two non-Metis party members to level 76 for their final skills, but that is not strictly necessary (Aigis and Metis should be at the highest levels since my guide has them always being in the party). If you must grind, taking the time to pick up a few levels before the final boss is probably the least offensive time to do so.
Is My Guide Good?
As a threshold matter, I promise that my guide is not one of the deliberately misleading guides I pondered in a 2020 article.
I used my guide in late 2014/early 2015, 4-5 years after I beat The Answer in the first instance, in a play-through with my friend New Leaf Journal colleague, Victor V. Gurbo (he unsurprisingly named the protagonist in The Journey NIXON). I did not use any other resources beyond my guide and my limited memory. The guide served me well – and we were able to efficiently grind through The Answer without second trips through dungeon floors or other cases of gratuitous grinding. I had less trouble playing the game unassisted back in 2010 than did some Game FAQs guide makers had by their own accounts, and my personal guide-aided play-through went smoothly. I vaguely recall there were 1-2 cases where I would have changed one character, but those were minor and may have had to do with how specific members of my team were leveling up (I would still never leave Metis).
Writing this reflection on my old Answer guide made me consider whether there is something to my limited-focus guide. Note that I did not offer any specific knowledge or information about enemy attacks or behavior – I simply recommended party configurations to give the reader a better chance that he or she would have in a blind run to play through The Answer in an efficient way. In effect – I suggest which characters to use but other than offering generic tips about playing Persona 3 well, I leave it up to the reader to fuse strong Personas for Aigis, analyze the enemies, and make good use of the party members I recommend bringing. For example, I acknowledged that Metis struggles to do damage in two of the boss fights – but a skilled player will have gained from making it to the boss with minimal resource usage in part thanks to Metis and can figure out how to make some use of her in the boss fight despite her unfavorable match-up.
I like the idea of slimmed down guides that provide a framework for playing through a game efficiently but leave it up to the player to figure out how to play well.
With all this being said – one key reason that The Answer is good, despite stripping away much of what makes the modern Persona games unique, is because it offers a strong but fair challenge. Unlike the AI in Mario Party, the AI in Persona 3 does not cheat. Unlike trying to take on a certain DLC at a low level in Fire Emblem Engage, The Answer never demands cheesy or gimmicky strategies. The Answer simply demands that the player apply what he or she learned in The Journey, navigate dungeons cautiously, and seek and exploit advantages in battles. As I noted regarding my first run, it is possible to win tough fights in The Answer despite bad match ups if the player makes the best of his or her party. Because The Answer is fair, my guide is not the only (it may not even be the optimal) way of completing The Answer efficiently. My approach may not be a match for every play style. But having come up with my strategy after a blind Answer run and then put it to the test years later in a separate run, I stand by my guide as providing a good blueprint for a fun and clean run through The Answer.
I recommend new (or returning) Answer players consider my recommendations, but even if one opts for a slightly different course, just remember one thing…
Metis is epic.
Foonote
- The Reaper is a maxed out level 99 enemy with huge stats and resistances to every attacking type. It appears if the player lingers for a long time on a single floor or stumbles on a floor or card where it arrives unusually quickly. If one ends up in a fight with it, the best strategy is almost always to mash “run” and hope you escape before meeting the game over screen. Reaper is significantly stronger than every enemy in The Answer, including the final boss, and fighting it at anything other than a much higher level than what is necessary to beat the final boss requires implementing one of a select few very particular strategies while balancing on a high wire (short of hoping for some absurdly good luck). I beat Reaper twice in The Journey using a different, original strategy that is not available in The Answer (see my companion article for that strategy). I never considered fighting Reaper in The Answer because I already had the full experience from The Journey. There is nothing significant to gain from fighting Reaper in the epilogue, and even if I were inclined to fight the Reaper, I did not end either run at a high enough level or otherwise have some very specific personas with specific moves that would have made fighting Reaper end in any manner other than a quick game over. Thus, nothing about my guide should be construed as involving picking an unnecessary fight with The Reaper. ↩︎