Below, you will find my guide for using PlayOnLinux 4 (henceforth “PlayOnLinux”), an open source graphical application for using WINE to run Windows programs on Linux. (WINE – which stands for “Wine is Not an Emulator” – is a compatibility layer for running Windows applications on POSIX-compliant operating systems, which includes Linux, MacOS, and BSD). My guide is simple and only demonstrates how to use PlayOnLinux for a Windows program (in this case a visual novel) that does not require any special configuration to work properly. In theory, my guide should work for PlayOnMac 4 (henceforth “PlayOnMac”), PlayOnLinux’s MacOS cousin, but note that I do not have any MacOS devices and have not personally tested it. PlayOnLinux, like WINE generally, is highly configurable and can be tinkered with such that it runs some Windows programs which do not want to run on top of an un-configured WINE.
As I noted – this is a very simple guide for running software which works without tinkering, namely the al|together visual novel translations written in ONScripter (a few of the non-ONScripter ones work without much hassle). Some Windows programs will require additional steps to run properly and others do not work even with WINE. If you need to set up a Japanese (or other) language environment to run something, see my separate guide on how to do so (that guide covers PlayOnLinux, Lutris, and Bottles).
(General Note: I have used PlayOnLinux on various Linux computers, including with systems running Bodhi Linux, Manjaro Linux, and EndeavourOS. This guide is based on my using it with EndeavourOS. The guide is only up to date as of publication or as of a subsequent update if noted.)
Prompt for this guide
(Skip to the guide if you are not interested in the backstory.)
My esteemed New Leaf Journal colleague, Victor V. Gurbo, asked me to recommend a creepy visual novel for him to read. I chose The world to reverse, which I reviewed recently on site. Victor is a Mac-user. The native Mac version of The world to reverse does not work on modern Macs (there is some hope this issue will be resolved in the future). I suggested Victor could try PlayOnMac to run the game. Victor decided instead to try it on his 2007 MacBook Pro, which I had set up with Bodhi Linux back in 2021. As I noted in my article on turning his old college MacBook into a BodhiBook, I installed PlayOnLinux on the MacBook and tested it with From the Bottom of the Heart and Crimsoness. However, walking Victor through the set-up process through messages was unexpectedly difficult. He ran into what he perceived as an issue and gave up for the evening. I decided to install PlayOnLinux on my own system and go through and document the process. While doing so, I figured that I ought to publish my piece as a guide for general readers instead of just sending it to Victor.
Notes on PlayOnLinux
(Skip to the guide if you are not interested in my prefatory notes – but note that while I think this guide should apply to PlayOnMac, I can only test PlayOnLinux on Linux.)
Before launching into my guide, I note that I do not use PlayOnLinux. I almost always use Lutris as my GUI WINE front end and Winetricks/Protontricks for any special configuration for WINE and Proton. Speaking of Proton, it is possible to use Steam and its Proton utility (Proton is a fork of WINE) to run Windows games on Linux. For example, Steam should be able to handle all of the Windows al|together games with Proton (note I have not tested all, but in theory it should work). I also use Bottles for Windows programs or special cases. PlayOnLinux is not regularly maintained and is comparatively dated. However, PlayOnLinux is not obsolete and it does have certain uses cases.
Firstly, PlayOnLinux has a MacOS version called PlayOnMac. As I noted at the top, I have not personally used PlayOnMac, but I understand that it works similarly to PlayOnLinux. Steam’s Proton, Lutris, and Bottles do not work on MacOS – they are all Linux exclusive. Thus, PlayOnMac (insofar as I have read) provides a good tool for MacOS users who want to run some older Windows games and who do not want to manage WINE prefixes with the command line.
(Note that WINE can be used from the command line, so this is a perfectly viable option on Linux, MacOS, or any other operating system which supports WINE such as BSD, Solaris, or HaikuOS, as an alternative to using a graphical utility like PlayOnLinux or PlayOnMac. None of the graphical tools are technically required.)
Secondly, PlayOnLinux is lighter than Steam, Lutris, and Bottles. When I was setting up Victor’s old MacBook with Bodhi Linux, I tried a few heavier programs and found that they choked his poor device, which has about 0.97 GB of working RAM. Due to its limited storage (I want to say it has a 60 GB HDD), I am not particularly inclined to encourage him to set up Flatpaks or Snaps on it (note that Bodhi Linux does not come with Flatpak or Snap pre-installed). PlayOnLinux is available from Bodhi’s own curated collection of recommended software and ran without any issues in my brief tests with the device back in 2021.
For putting together this article, I installed PlayOnLinux from the Arch User Repository on my main computer running EndeavourOS, which has a relatively modern CPU to go with 32 GB of RAM. I had not used PlayOnLinux in more than two years, so this served as something of a refresher to me. I should have tried it on my old computer (the one on which I launched The New Leaf Journal in 2020), which now runs Bodhi Linux itself, but I only thought of that after having already run through the install process on my main workstation.
Using PlayOnLinux to Install Non-Listed Programs
Below, you will find my illustrated guide to running simple Windows programs (heretofore defined as Windows programs which work on top of WINE with no special configuration) through PlayOnLinux. While my understanding is that my guide should work with PlayOnMac, I cannot confirm anything regarding PlayOnMac since I do not have a MacOS device.
Install PlayOnLinux (or PlayOnMac)
I am covering PlayOnLinux and PlayOnMac 4, not the in-development Phoenicis versions (which will be version 5).
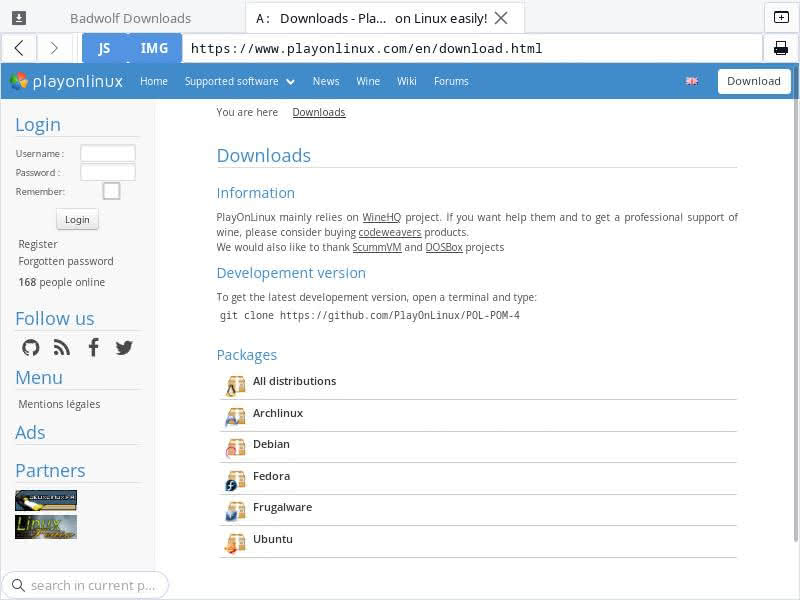
Linux users should be able to find PlayOnLinux in their package repositories. It is available through the Ubuntu 20.04 repositories for Bodhi Linux. On my main workstation which runs EndeavourOS, I installed it from the Arch User Repository (it is no longer in the main Arch repository). The PlayOnLinux site has instructions for different distributions, albeit some may be outdated (see docs). In the event you cannot find it in your package manager, there is a generic package which should work on all Linux distributions.
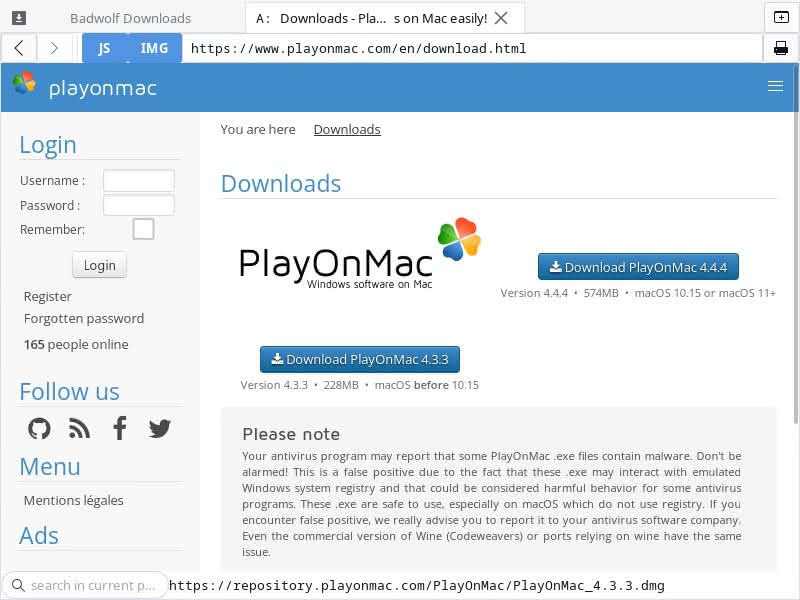
PlayOnMac can be downloaded from the PlayOnMac website (see page). There are separate releases for MacOS versions numbered 10.15 or 11 and above and all other MacOS releases. PlayOnMac can also be installed with Brew (see page). Again, note that I have never personally used or tested PlayOnMac.
After installing PlayOnLinux or PlayOnMac, you can start the program and run through the basic configuration, which will give you the option to decide where PlayOnLinux’s or PlayOnMac’s virtual drives are stored (it creates a directory in Home by default on Linux). There are additional configuration options which can be set at launch, but for our purposes we will use the defaults since I know those work for the games I am demonstrating.
Installing an unlisted program in PlayOnLinux
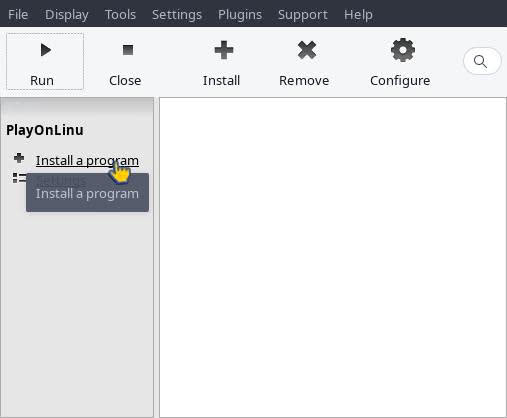
After first setting up PlayOnLinux, you will be greeted with its menu but no programs. PlayOnLinux (and I assume PlayOnMac) have a list of installers for common Windows games and programs. Unsurprisingly, the 2006 English-language translation of The world to reverse is not one of those Windows programs. Thus, we will need to use our own installer with PlayOnLinux.
First, from the PlayOnLinux home screen, click “Install a program” on the left sidebar:
On the next screen, look for “Install a non-listed program” in the bottom left and click:
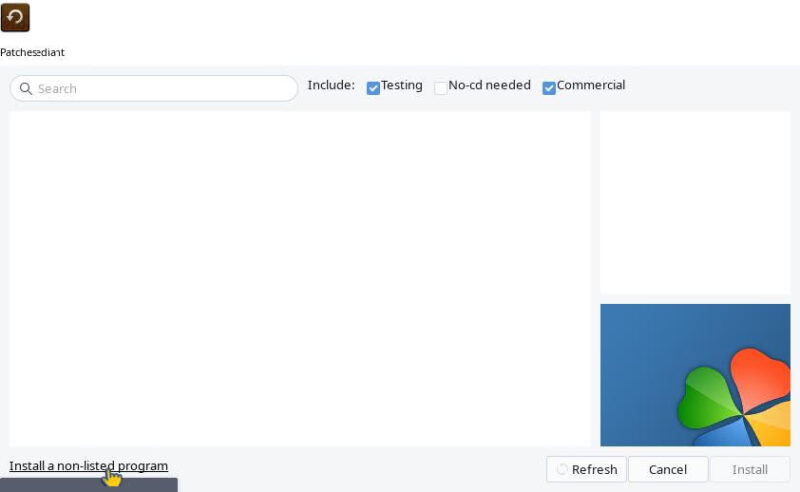
We will eventually be asked to provide a Windows executable, but there are a few steps to complete beforehand.
Create a new virtual drive
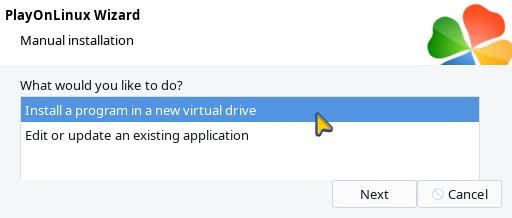
It is good practice to create virtual drives for each of your programs – although I will note that it would probably be fine in the case of the English ONScripter-based al|together translations to put them in a single drive (only the ONScripter ones, however). But we will follow best practice. Thus, we select “Install a program in a new virtual drive”:
You then have to give the drive a name. The name can be whatever you want, but it makes sense to give the drive a name that corresponds to what you are using it for.
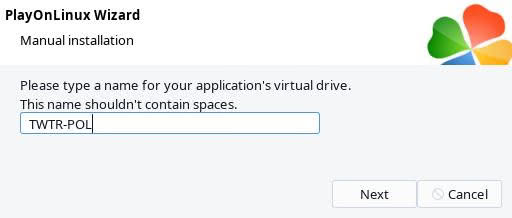
I named my drive TWTR-POL for purpose of this demonstration. PoL recommends not using spaces in the drive name which is generally good practice on Linux.
Configuration options
Next, PlayOnLinux will prompt us with a screen with three options.
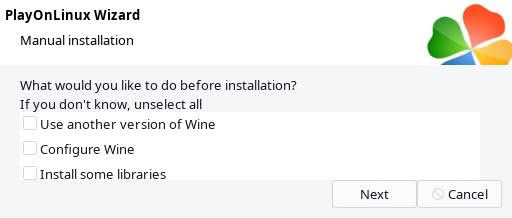
Here, we can choose our WINE version, configure WINE, and install specific libraries. Libraries here refer to Windows libraries that can be installed in the virtual drive. There are many Windows programs which may demand specific versions of WINE or require specific libraries. However, ONScripter al|together games are not among them. Thus, for this simple demonstration, we can decline these options and proceed to the next step.
PlayOnLinux then asks us whether we are creating a 32-bit Windows drive or a 64-bit Windows drive. Again, some programs may require one or the other.

All of the ONScripter-based al|together translations I have run work in both 32- and 64- bit drives. 32-bit makes sense given what they were originally written for, so we will leave this option unchanged. The Windows installation version is one thing that cannot be changed after the fact (unlike WINE versions or extra libraries), so make sure that you choose the correct version for whatever you are installing at this step.
Select your .exe
After PlayOnLinux sets up our drive, it asks us to give it a file to run. Here, you will click “Browse” and select the .exe from your file system:
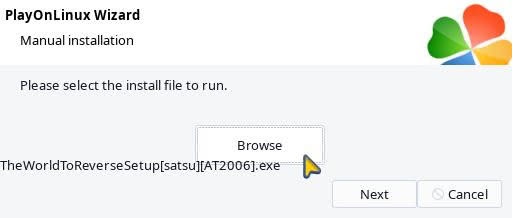
As you can see under “Browse” in the screenshot, I selected the Windows installer for The world to reverse.
Run your installer
(Note: Not all programs have installers. Thus, in some cases, you may just run the program itself. See my Yuuki!Novel essay for an example. However, this guide concerns using an installer to install a visual novel.)
Assuming your virtual drive agrees with whatever .exe you gave it, the .exe should launch. The world to reverse installer launched as expected in my case:
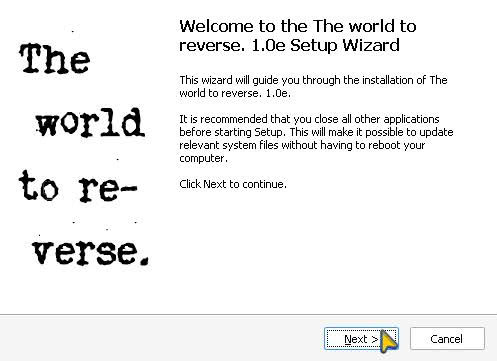
(For people who have read my reviews about running these novels on Linux, note that this process is a bit different. Were I running the Windows .exe natively on Linux, I would extract the .exe and then run the Linux ONScripter-EN executable in the resulting directory as demonstrated here.)
In this case, the installer asks me to select a path. Note that this path is inside the virtual Windows drive created by PlayOnLinux.
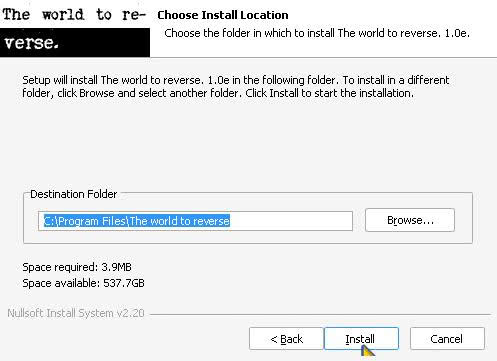
I have no issue with the default, so I hit Install.
The installer finished its work.
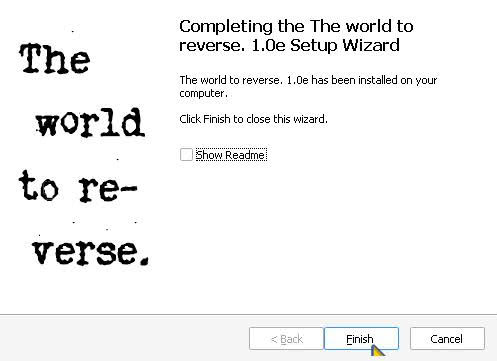
Now here it is important to understand how your particular installer works. The world to reverse, for example, extracts itself and the contents of two visual novels in a directory (similar to how I work with the .exe on Linux, actually). Thus, there is no option to actually launch the game after running the installer. The only option is to view the game’s Readme (which would explain the two novel-set-up). This is where I think my distinguished colleague became a bit confused. Most of the al|together Windows installers will allow you to actually launch the novel from the final setup screen, but not The world to reverse. Thus, I unchecked Show Readme (I have read it before) and hit Finish.
Set up program shortcuts in PlayOnLinux
After completing the installer, PlayOnLinux will ask you to make shortcuts. This is not technically necessary, but one of the neat things about tools such as PlayOnLinux is that it allows you to launch Windows programs from a graphical user interface, without the command line or digging through your virtual drives. Thus, there is no reason to not take PlayOnLinux up on its offer. This process can be confusing in some cases because PlayOnLinux does not necessarily know what program you actually want to launch. It offers everything that it identifies as being amenable to being launched as options and leaves the rest up to the user.
The world to reverse is unusual because the installer dumps the contents of two separate visual novels in your virtual drive. As readers of my review will now, the two novels are hallucinate and flanca. Thus, we will want to find the launchers for both novels and add them as shortcuts to PlayOnLinux. I will start with flanca.
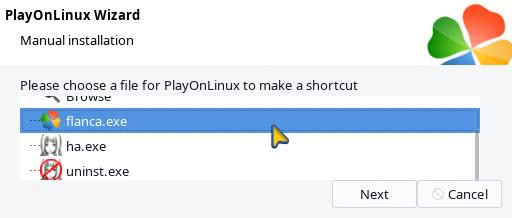
You can see our select screen above. In my scroll window, you can see flanca.exe, ha.exe, and uninst.exe. The two executables we want are flanca.exe and ha.exe, which launch flanca and hallucinate respectively. The uninst.exe would launch the uninstaller for hallucinate (you can tell it corresponds to hallucinate from the shortcut image). We only need flanca.exe and ha.exe. Because flanca.exe is listed first, let us start with that. After selecting flanca.exe, PlayOnLinux asks me to name the shortcut.
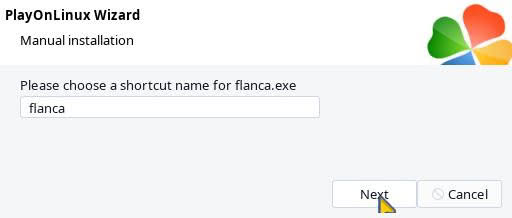
Note that the name does not change the name of the executable itself, only the name of the shortcut. By default, it uses what comes before the .exe. I would have named it flanca, so the default here is acceptable.
After adding a flanca shortcut, PlayOnLinux returns us to the shortcut scene and asks us if we want to create more shortcuts. Indeed we do. Now we select ha.exe for hallucinate:
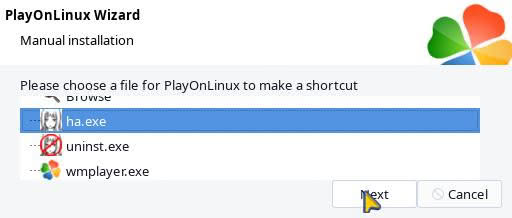
Note flanca.exe is no longer an option since we already created a shortcut for it.
In this case, I want to rename the ha.exe shortcut since the default would be ha.
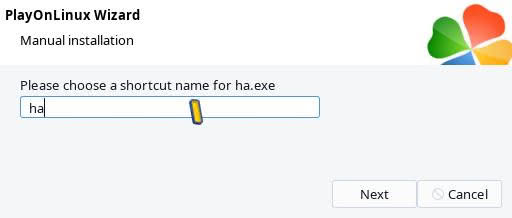
I think “hallucinate” makes a better shortcut for a novel called hallucinate:

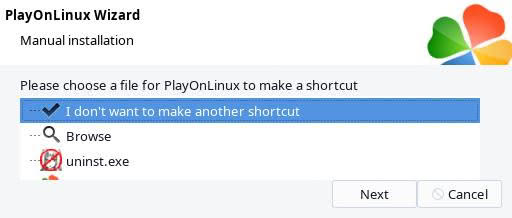
After it creates our hallucinate shortcut, we return to the shortcut screen. I do not want to make any other shortcuts, so I scrolled up and selected “I don’t want to make another shortcut” and hit Next to end the process:
Now let us make sure that our shortcuts work…
Testing our shortcuts
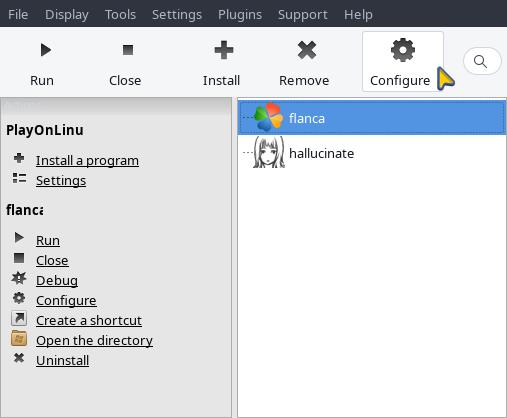
Before declaring victory, I want to make sure that the two novels actually launch. Both of the shortcuts now appear on our home screen. Let us test hallucinate first:
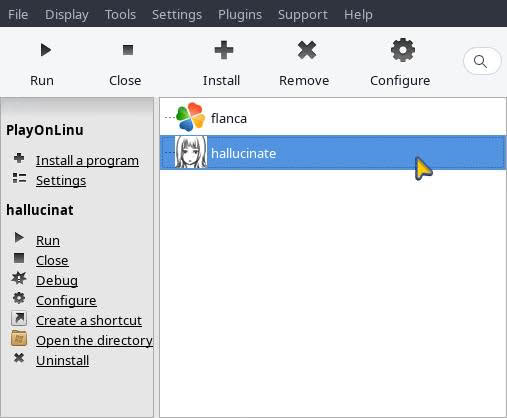
You can either double click on the shortcut or highlight it and click “Run” in the top left:
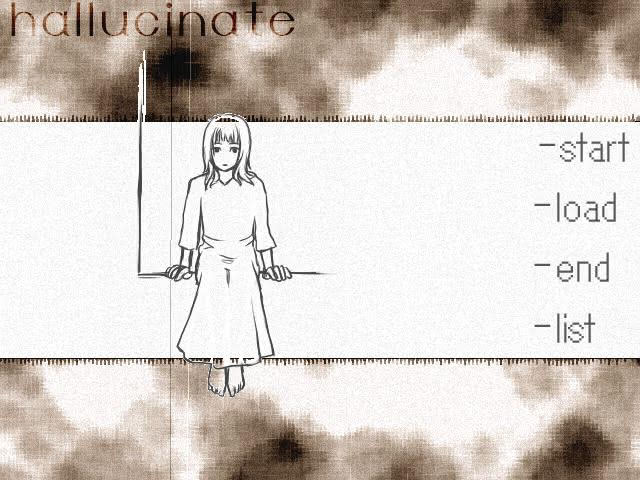
hallucinate launched as expected. Without sound, however. I would have had to start Fluidsynth for sound since this particular novel uses MIDI.
But I digress. Let us make sure flanca works:
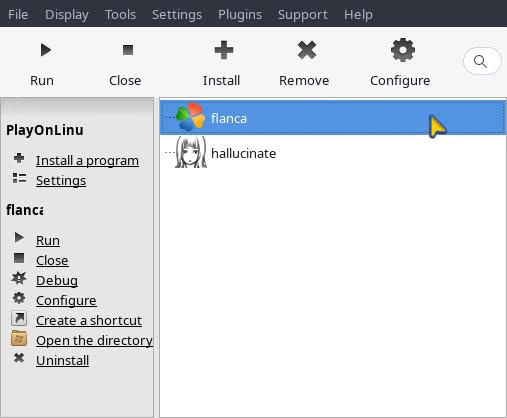
Launch…
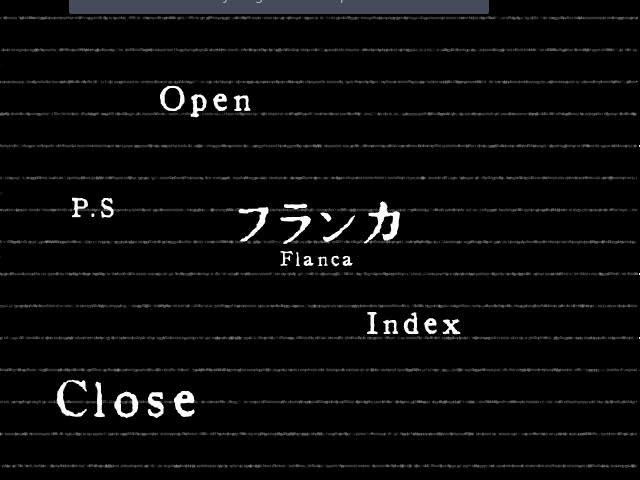
Both of our shortcuts work perfectly.
Adding shortcuts
Because I think that my esteemed colleague likely found himself lost at the shortcut stage, I will add a quick guide to adding shortcuts and modifying your virtual drive. First, go to “Configure” on the main menu bar:
This opens up a configuration screen which will list all of your virtual drives and shortcuts.
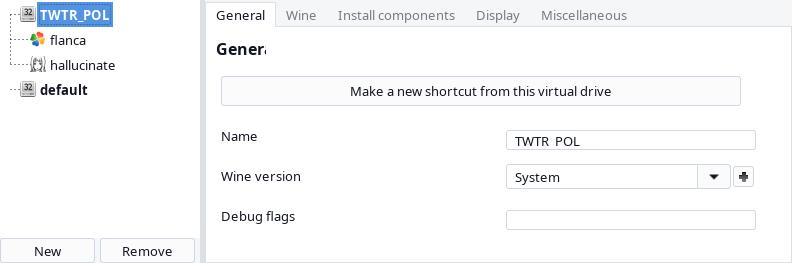
It is simple for us because we only have one virtual drive. But if you have more than one drive, you will need to make sure that you are making changes to the correct drive.
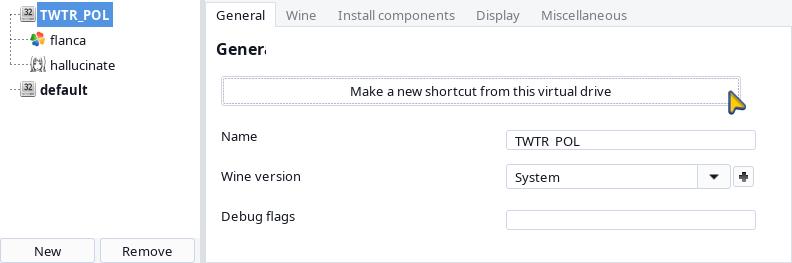
The configuration menu is very powerful. You install new components in the drive, change the WINE version and settings, and set launch options (see, for example, my guide to setting the language environment). But for this exercise, I will show you how to create a new shortcut. Imagine you accidentally completed the process without creating a shortcut for one or both of hallucinate and flanca and wanted to go back and make one. First, let us highlight TWTR_POL, which is our drive, and then click “Make a new shortcut from this virtual drive” (under “General” on the right):
This brings us back to the shortcut wizard. Because we already made shortcuts for ha.exe and flanca.exe, those options are not available. We have the remaining possibilities discovered by PlayOnLinux. In the unlikely chance your choice is missing, you can click browse to find what you’re looking for. For this exercise, let us pretend that I needed to make a shortcut for the hallucinate uninstaller, which is uninst.exe.
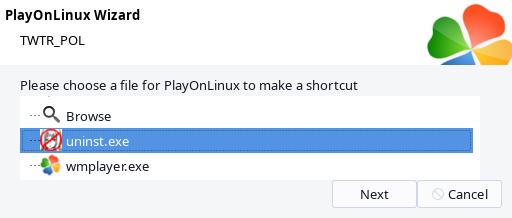
I will rename it ha-uninstaller to make it more descriptive than the default “uninst” (in theory, uninst.exe would have been unclear as to which novel it applied).

After my shortcut is created, I select “I don’t want to make another shortcut” to exit. Now you will see the new shortcut on the homes screen:
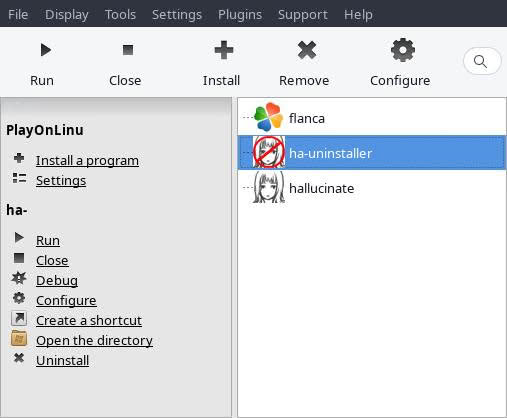
I removed the shortcut after creating it since I would have no reason to install (or use) the uninstaller in the PlayOnLinux context. But I included that demonstration to highlight how you can create a shortcut to an executable you missed in the initial set up or to otherwise add one to an existing drive. That process would have worked just as well had I initially failed to make a shortcut to flanca.exe or ha.exe.
Conclusion
This concludes my PlayOnLinux 4 guide for Linux. As I noted, my understanding is that this guide should apply generally to PlayOnMac, but never having used PlayOnMac, I cannot state that this is the case from first-hand experience. In general, I would recommend Lutris as the best graphical WINE front-end and games manager for most Linux users (Bottles is also a good option but I prefer Lutris for games). Steam also works well for most cases with its built-in Proton, but I have not personally used Steam to run non-Steam games. PlayOnLinux 4 does still work, however, and it is a good choice for unusually low-powered systems such as a 2007 Bodhi Linux-edition MacBook with 0.97 GB of working RAM. MacOS appears to be lacking compared to Linux in the area of graphical free and open source WINE GUIs, so PlayOnMac 4 seems to be a good option for MacOS users who can run it. I am aware that PlayOnLinux 5 and PlayOnMac 5 are in development, but I have no (practical) experience with either (I briefly tried PlayOnLinux 5 in 2020 or 2021 and had some issue or another with it).
This concludes my little guide. Note as always that all of my notes apply to my own system and they are only accurate as of the date of publication of this article. Your system, as well as future updates, may give you a different experience in one area or another.